
How to emulate a record player in Sprite Kit using Swift and Xcode
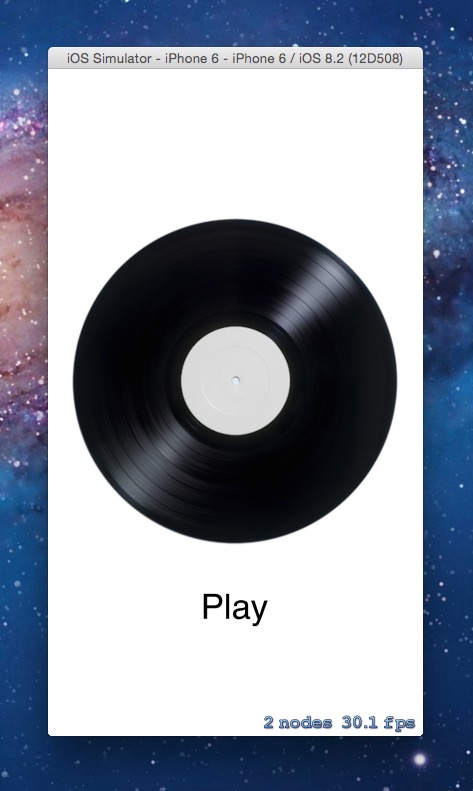
In this tutorial I will be showing you how to create your very own record player in Sprite Kit using Swift. This is a small section of an app that I am building for a band that is set to be released in a month or so. Keep an eye on the blog to keep updated with that. Here's what our project is going to look like when we're done.
What to expect
When you press the play button, the disk begins to spin and our music begins playing. After, a pause button will appear that allows you to stop the disk and pause the music. Sound complicated? Don't worry, it's very simple and will teach you a whole lot about Sprite Kit and how to get the most out of Apple's wonderful frameworks.
Just a small disclaimer, this tutorial is written for intermediate programmers, as I'm not going to explain every last thing, mainly to keep things short and sweet. That shouldn't scare away new programmers or those new to Swift, as the material won't be too difficult to understand. Don't be afraid to ask me to explain something in the comments if you like.
First things first, let's create a new project in Xcode. Choose Game from the initial screen and then set the title to whatever you like, I'll be using RecordPlayer. Also, you can choose iPhone from the devices dropdown as I did, and make sure Sprite Kit is used.
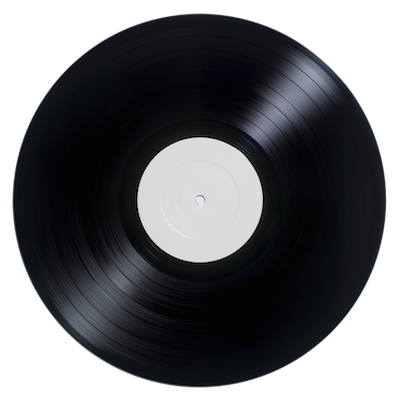
Let's add the two files that we'll need from the outside world to the project. Visit www.bensound.com and download the song file there, then add it to your project, making sure that the copy files if needed is checked and the file is added to your project's target. Then, go ahead and download the image of a record I have below and add it to your Images.xcassets folder.
Next, we're going to jump right into the GameScene.swift file of your project. Right at the top, before where your class starts, we're going to add a few variables that we're going to use throughout the project. Also, we're going to add the AVFoundation import so we can support our AVAudioPlayer. The code for this is below:
1import AVFoundation
2
3// Variable setup
4var disk = SKSpriteNode(imageNamed: "disknew001.png")
5var playButton = SKLabelNode(fontNamed:"Helvetica")
6var pauseButton = SKLabelNode(fontNamed:"Helvetica")
7let action = SKAction.rotateByAngle(CGFloat(-M_PI), duration:1.5)
8
9// Song setup
10let song1 = NSBundle.mainBundle().pathForResource("bensound-funkyelement", ofType:"mp3")
11let fileURL1 = NSURL(fileURLWithPath: song1!)
12var player1 = AVAudioPlayer(contentsOfURL: fileURL1, error: nil)
This should be self-explanatory, as we're just declaring our variables - the disk, the two button labels, and the disk's spinning action. The player setup may seem a bit strange, but this is how you set up an AVAudioPlayer in Swift.
Now in your didMoveToView function, we're going to add our background color, the disk, and the play button to the scene. We also set up the pause button, but we don't add it just yet as we want that to be shown only after that play button has been pressed. This is a concept you should get used to, as there multiple times throughout any given project where you want a button to only show after another button has been pressed. The code for all of this is below:
1// Background Color
2scene?.backgroundColor = UIColor.whiteColor()
3
4// Disk
5disk.position = CGPointMake(CGRectGetMidX(self.frame), CGRectGetMidY(self.frame) + 25)
6disk.yScale = 1.00
7disk.xScale = 1.00
8disk.name = "disk"
9self.addChild(disk)
10
11// Play Button
12playButton.position = CGPointMake(CGRectGetMidX(self.frame), CGRectGetMidY(self.frame) - 250)
13playButton.name = "Play"
14playButton.text = "Play"
15playButton.fontSize = 40
16playButton.fontColor = UIColor.blackColor()
17self.addChild(playButton)
18
19// Pause Button
20pauseButton.position = CGPointMake(CGRectGetMidX(self.frame), CGRectGetMidY(self.frame) - 250)
21pauseButton.name = "Pause"
22pauseButton.text = "Pause"
23pauseButton.fontColor = UIColor.blackColor()
24pauseButton.fontSize = 40;
Wrapping up
Almost there ya'll!

If you run your project now, you will see everything on the screen, but nothing will happen just yet when you press the play button. Let's change that!
Down below your didMoveToView function, you'll notice a touchesBegan function. This function exists to handle touches on variables we declared earlier. That's why we named each of our variables. What we're going to do here is respond to two different touches. The play button is going to make the disk spin, then it removes itself from the view and adds the pause button to the screen. After it's done doing that, it's going to start playing the music we prepared earlier. Again, the music set up may seem weird at first, but you'll get used to creating AVAudioPlayers for all different types of reasons.
The pause button acts similarly to the play button, but it does things that a pause button should do. First, it stops the disk from spinning, removes the pause button from the screen, and then adds the play button back to the mix. Then finally, we pause the music until the next time the play button is pressed. You can see all the code for this right here:
1for touch: AnyObject in touches {
2  let location = touch.locationInNode(self)
3  let touchedNode = self.nodeAtPoint(location)
4
5  if touchedNode.name == "Play" {
6    disk.runAction(SKAction.repeatActionForever(action))
7    playButton.removeFromParent()
8    self.addChild(pauseButton)
9
10    // Set up and start the player
11    player1.prepareToPlay()
12    player1.play()
13  }
14
15  if touchedNode.name == "Pause" {
16    disk.removeAllActions()
17    pauseButton.removeFromParent()
18    self.addChild(playButton)
19
20    // Pause the player
21    player1.pause()
22  }
23}
That's it! I told you it was easy.
Now you have a real-deal record player right on your iPhone! Take what you learned here and apply it to your own apps and ideas.
Here's the link to the GitHub files in case you want to check out the code for yourself. As always, any feedback or questions are welcome. Thanks for joining me.